Showing posts with label Painting. Show all posts

October 19, 2013

The Kitchen Painting is Complete!

I finished the last wall in the kitchen.  Woo-Hoo!


The color is Silver Coffee Pot by Sherwin Williams.  I posted about the color here.

I ended up doing all the painting.  My husband kept saying he wanted to do it.  He was adamant and I didn't push the issue til I couldn't stand it anymore.  It worked out great.  He's relieved to not have it on his honey-do list.  He's thrilled with how good it looks (I cut in all but one wall without painters tape, thank you very much).  And as for me - look out!  I have some interesting paint plans for the future.  Next up - our side entry.


I focused on one wall/area at a time.  That turned out great.  I cleaned like crazy as I went.  OMG.  I don't fry food, but you'd never know that from the build-up on my teapot/pitcher collection that was over this counter.

September 9, 2013

My White Cupboard AND Paint Plans

I have a white cupboard for sale in my booth.   It was made to look like this one my hubby made for me a few years back. It's one of my favorite pieces in my house. It's also one of the most useful things I own.  I use it every single day.


I've actually posted about this cabinet in the past, after hubby and I re-furbished it.  BUT... I didn't have the sunflower painting at the time.  I love that extra bit of color.  

BY THE WAY - the splotchy looking wall to the left of the cabinet shows several paint colors we were considering. We're getting ready to paint the kitchen/family room/dining room and I painted test colors all over the place. 

It looks a little too greenish on my computer.  It's a nice greige.

Neither of the colors on the wall are the one we chose.  We decided on Silver Coffee Pot. I would have loved stark white walls - love that look - but several items we have, including our creamy colored kitchen cabinets, didn't support the look.  I also thought about a pale ocean-y blue-green.  I found a number of inspiration photos that I loved.  In the end, I decided to stay neutral in the big rooms.  


We'll have the blue I love (SW-6478 Watery) in the side entry room.    

Silver Coffee Pot (DMV-104) is apparently an obscure Sherwin Williams color.  I found it an an old color brochure I had - George Washington's Mount Vernon Estate of Colours.  When I took it to the paint store, the clerk said the brochure was collectable and worth some money now.  Who knew?  I won't be selling it.  It has some fabulous colors.  I have the big fold up brochure.  It's really BIG.

I tried to find a chip online to copy and use in this post. Apparently, Fine Paints of Europe took over this collection.  The colors (with the same names) can now be found here.

I hope all the rooms get painted soon. My hubby promises SOON. We've had the paint since April. In his defense, he's been really busy. On the other hand, I'm PERFECTLY capable of painting walls. ^%$#@! But, he's insisting on doing it himself. One day. I love that man like crazy, but he does have quirks that drive me insane. Anybody else married to a man with quirks? I feel confident I'm not alone.

June 9, 2013

My Grandmother's Side Table Gets a Re-Do

I adored my grandmother.  We were really close.  She's gone now, but to tell the truth, it feels like shes still with me.  I generally know what she'd say about things, but I have no idea what she'd say about seeing her side table painted.  She took a paintbrush to many of her things over the years, so hopefully she'd like it.

The table was one that she had in her den as long as I can remember.  I used to love to dust at her house and this table was a fun spot for that.  Thinking back, I don't actually remember anything being dusty.  I just loved moved her treasures around and hearing her talk about them.  Unfortunately, that love of dusting didn't last into my adult years.


Anyway, back to the table.  It had seen better days.  I am in a phase where I'm looking at everything I own and thinking, "Use it or lose it".  This table was not being used.  I was NOT letting it go.  In order to keep it, I needed to make it pretty and put it in a spot where it would make sense.  I'm proud to say, I did just that.


I love color and thought about all sorts of colors I could use.  In the end, I went with white.  It just seemed right for this table.  When my grandmother had this table, the bottom shelves were always filled with books and magazines.  At our house, they are holding the sofa pillows.  Hubby always tosses them off to give our dogs more room on the couch.  That's the sad situation at our house.  Dogs trump wife.  I put the pillows back on.  Now, they are stored on this table and I can access them when I want.

I put a piece of glass on top of the table.  This was a piece that I had in the attic.  It almost fit.  Hubby got a new piece for me that fits perfectly.  I don't have a photo of that and I'm just too lazy to take another.

This project was completed a couple of months ago.  I have been really bad about posting lately.  I'm playing catchup.  Looking at this photo reminds me of things that have changed and are changing.  My current project is making a slipcover for the loveseat.  The worst of that is finished.  I just need to finish the cushion covers.  I need a day where energy and motivation combine.  :-D

June 5, 2013

Organized Paint Hoarder

I organized my paint by color the other day and realized, I am a paint hoarder.  I obviously have a problem.  I've been painting lots of signs over the last year or so and there's always another color I need.  My first thought was to ban myself from buying any paint for at least 6 months.  I panicked just thinking about it.  What if I ran out of my favorite blue?  So now, I'm making deals with myself.  I can restock tired and true colors, but seriously, I need to use what I have.  A whole wall of paints???  It's ridiculous!  Sigh.  Maybe organizing is the first step to getting a handle on my addiction.

This paint wall is in my attic storage room.  I have attic access right off of my loft craft room, so this is very convenient.

August 24, 2011

Farm Tables - What Color?

I have two small tables to paint and I am having trouble making a decision about paint.

I have two coats of primer on both.  The first is a table I've had for years.  It had been painted with crazy colors in multiple patterns.  I had used it in my classroom in my past life as a teacher.

The second table is a good bit heavier and maybe a little older and more rustic.  I fell in love with it at an auction, which means I bid a little higher than I should have.  It also means there's a very good chance I'll keep this one.

The safe way to go would be to paint them both white.  They could go right into the white booth and they'd definitely sell.  That may be what I do with the first table.  But the rustic farm table?  White?  Oh, I don't know.

The above photo is from Cottages and Bungalows magazine - the May, 2011 issue.  I've been saving this photo since May.  I fell in love with the strong green and blue, so much so that I bought a quart of paint in each color.  I haven't used the paint yet.  I've been waiting.  I had thought to paint something unimportant and try it out.  Nothing unimportant came along.  Do I dare use it on my farm table?  It's only paint.  The worse that could happen is I have to paint over it.

The first place I looked for inspiration was my recent post on farmhouse tables.  There are some respectable tables on that page in white.  There's also a soft green.  I definitely have green paint in safer hues.

But I needed more adventurous inspiration.  I didn't find much, but I did find one similar table.

Carol Wingert had no fear of bright green tables.  She didn't have to paint hers.  I t came that way... all the way from France.  That must be a sign.  My ancestors came from France and the French are noted for their amazing style and taste.  Can you see that I'm trying to work up my nerve to paint my table kelly green?

Here's another peak at a vignette on her table -

My original inspiration table is more distressed than this one and looks like it has a good coat of glaze as well.  Plus it has sprinkles of tiny black dots.  It looks like they used the toothbrush trick to create a spray of dots.  That's a messy task, but I definitely plan to add that.  You know - I think I've talked myself into it. I have nothing to fear but fear itself. 

May 15, 2011

Mr. Wheat's Rockers

Mr. Wheat replaced his front porch rockers.  He gave the four old ones to me.  The bones were good and sturdy but had definitely seen better days.  Time for a bit of rocker resuscitation!

The first step was to remove all the seat rushing.  This was no small task.  It was messy and dusty.  Mr. Wheat keeps a spotless home, but anytime furniture is left outside, even on a covered porch, the are places that even a clean freak can't clean.  Between the rushes is one of those places.

Next I painted the rockers white.  Painting chairs and rockers is very tedious, so I decided this was a fine time to finally try out my new power spray paint gizmo.

That may have been my first and last time using a power sprayer.  I have a love/hate relationship with the thing.

LOVE:
  • It covers in no time.  

HATE:
  • It uses up paint at a shocking rate.  
  • Each time the container gets a little low (which is very, very often), the paint spits out, making blobs that need to be touched up immediately.  
  • At one point I didn't screw the container on correctly and when I picked up the sprayer, the container dropped and paint went everywhere.  
  • I used three large dropcloths.  (The photo above doesn't show them all.  I had already started moving stuff when I remembered to take a photo.)  Three dropcloths was not enough.  
  • The sprayer should not be used when there's any wind at all.  
  • The sprayer needs to be cleaned up very, very well, otherwise it won't work well the next time you use it.  It takes a long time and a lot of water to clean all the parts. 
  • By the end I was exhausted and covered in paint from head to toe.  I am not a power sprayer kind of girl.  I'll stick to my nice and slow and slightly meditative old fashioned painting.  But the chairs turned out great.

Note - If you had two very organized people working together and you had a lot of things you wanted to paint the same color and  if you were willing to use up a lot of paint and if you had a great place to paint with lots of drop-cloths, the power sprayer could be a very good thing.

Once the paint had thoroughly cured, it was time to weave the seats and back. 
I have a chair-weaving tutorial in a previous post.

Even though I stuck to a color palette of red, green, tan, and white, the pattern is still a little busy.  I'm not worried.  Once I add pillows and cushions, not so much of the pattern will show up.  Meanwhile, the pattern hides dirt and fur.

Once I sat in the chairs, I realized that they weren't all that comfortable.  They could use some cushions.  Not a problem.  I came across four old cushions at a yard sale that fit perfectly.

The cushions are weathered and worn, but that didn't concern me.  I'm planning to make covers for them in a pretty fabric.  That means I can't mark this project off my list.  I also want to add small pillows on the chairs.  That's not a huge rush.  I'm keeping my eye out at yard sales.  Maybe I'll even come across some that don't need to be re-covered! 

I have shared this post on the following link parties:
Saturday Nite Special at Funky Junk Interiors
Favorite Things Saturday at Bargain Hunting with Laurie 
Weekend Wrap Up Party at Tatertots and Jello  

March 5, 2011

Chairs with Fabric Woven Seats

That title sounds horribly dull, but hopefully the post will be interesting!  Years ago, I figured out how I could re-do chairs that had damaged woven bottoms without having to spend a fortune taking them to a pro.  I could weave new bottoms and/or backs from leftover fabric or worn out sheets or dropcloths.  See tutorial here.

I recently wove a set of four ladderback chairs using dropcloth fabric. I put them at my store.  They aren't in my booth.  Another vendor had a vintage library table from Auburn, Alabama and the wood from that table went perfectly with my chairs.  The look great together.


The dropcloth fabric was a real mess to work with.  It ravels horribly.  On the other hand, the messy edges of each strip really give the finished seats more character. 

The color and texture look really nice with this dark wood.  It looks a bit like linen, but of course it's much tougher.

I wove another lone chair with brighter fabrics.  I used to use a real mix of fabrics and colors.  The last time I did that (see my Rocker Re-Do) I decided it turned out way too busy to suit me.  This time I stuck to a bit of a color palette - red, white, and pale green.  It's bright, but in a nice folksy way.

It's in my booth on top of a table.  There's another photo of it in yesterday's post.


You might recognize the green paint on this chair. It's one of the ones I painted while trying to find my perfect green. (See Experimenting with Green Chairs and one of my favorite posts - Smitten with Green) I really roughed this chair up, going for a very chippy vintage look.  It was fun to do.  I put the chair out on my porch for a photo and almost didn't have the heart to take it to my booth.  I'm selling it for $24, which is ridiculously low for the work I put in it.  Oh well.  It was fun. I saw a similar version on Etsy for $140 plus $30 shipping.  I wonderful if she has ever actually sold one of her chairs for that much.  I should probably mark any future chairs I weave a little higher.


The woven seats hold up well.  I have one that I wove over a decade ago.  It has been on a porch the whole time.  The fabric shows some fading but is still very strong. It's in better shape that a chair with a rush bottom would have been!

The next seats I weave will probably be for me.  I have four wonderful, large, oak rockers given to me by a friend, waiting to be cleaned up, painted and woven.  I'd really like to tackle that project in the next month or so.


February 5, 2011

Experimenting with Green Chairs

In my quest for dining room chairs I love, I am experimenting with green finishes.  I found a green paint that I find very appealing.  I had several chairs in my attic waiting a new finish.  I am using those to experiment with. 

Back in the summer my sister-in-law and I came across two vintage chairs just waiting for a makeover at the bargain price of 2 dollars each!  They are sturdy and well made. 


First I painted them with several coats of Behr Premium Plus Ultra Paint and Primer in One, custom mixed to match Martha Stewarts MSL106 - Rhododendron Leaf. I have really been liking this paint.  It has ceramic in it.  I've only needed two coats for everything I've done so far.  Plus, it seems really tough.


At this point, the green is pretty, but it's a little boring.

I did some distress sanding, then mixed up a glaze.  I didn't waste a lot of time fretting over my glaze.  First I mixed a brown I liked by using a bit of medium brown craft paint I had on hand and adding black to make it a darker brown.

Then I added the glaze mix.  I had a ratio of about 2 parts glaze to one part paint.  Even so, I had less time to play with it than I would have liked.  I would also rather have a glaze mix in a container that was easier to pour. 

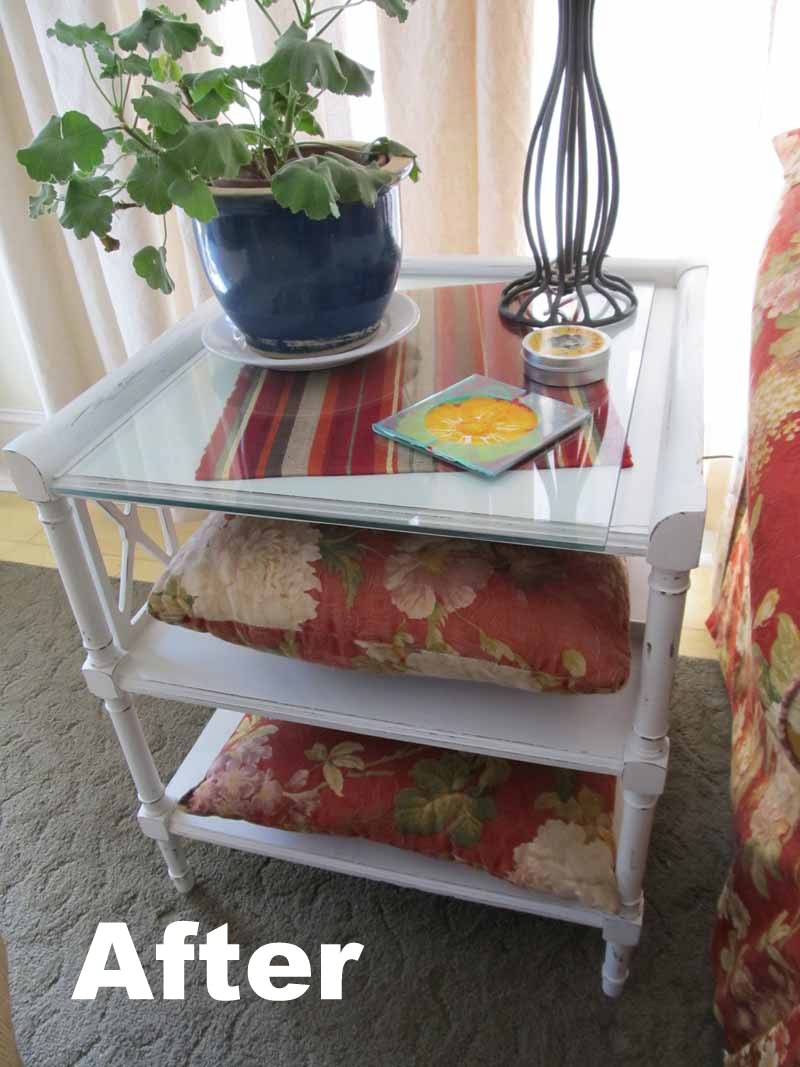
Glazing is OK, but I think I like using Howards Citrus Wax in mahogany better for adding a little age and character.  (I'll show that technique in a post coming soon about an end table I just finished.)  I also might try the dry brushing technique used by Miss Mustard.  I talked about that and linked to it in my last post.


The photo below shows the two chairs in two stages.  On the left the chair has been sanded, but not glazed.  On the right, it's finished.  My glazing was fairly subtle.  I wiped a whole lot off.  It's not all that easy to see a difference, but it definitely looks more aged after the glazing.  These chairs didn't have a lot of nooks and crannies for glaze to accentuate.  The dry brushing technique probably would have been more appropriate.  Unfortunately, I came across that idea after I had already glazed.

On a funny note, after my husband saw the distressed and glazed chairs, he said they looked like chairs that needed to be painted.  He was trying to push my buttons.  I swear, that man lives to aggravate me!  And clearly, he doesn't recognize that he is in the presence of an amazing artist!


Here's a closeup. Again the one on the right is glazed.  The one on the left is not.  The closeup shows how the glaze got into the imperfections just enough to add age and character. 

I moved the chairs to the dining room to live with the color for a bit.  (Sorry, no photos)  I like the color and I like what the color adds to the room.  These two chairs are not the style I'm looking for.  

What kind of chairs am I looking for?  I want chairs with tall backs and solid seats.  They need to be heavy and sturdy.  And they must be comfortable.  I know I'll find MY CHAIRS one of these days.  I have a feeling it won't be long.

January 28, 2011

Sweet Little Hutch Makeover

I found a very tiny, slim hutch at a yard sale months ago.  It had the original maple finish on it.  I knew that with a little paint, it would be a gem.  I debated on colors.  My wild side wanted to paint it a fun color, like red or turquoise.  A practical choice won out, but only because I was thinking seriously about using it in my loft and I knew what color would look great there - cream.  

 This is the after shot.  I fell in love with this little hutch and wanted to keep it, but wasn't quite certain where it would be of best use in our home.  Then, as fate would have it, our booth was wiped out.  Several big pieces sold within days of each other and replacements were needed asap.  The sweet little hutch had been set aside for the paint to cure and harden and happened to be ready to go.  I needed to send it on with the hope that more pieces will come along that I love.  The picture above was a staging picture for me show how adaptable the hutch could be.  It would be great in a bathroom (see the toilet tissue), as a pantry (canned goods), as a bookshelf or entertainment storage area (books, CDs, DVDs).  


Here's what she looked like before.  Note the wear and tear and the outdated wallpaper border.
I love that the hutch is small and in two pieces.  It was easy for me to transport in my car without any help. I wish I could find more pieces like that.
Here she is during the painting.  I was quite careful and the end result is wonderful.  Even though I love to finish up with distressing and a stain or wax rub, I left this baby plain.  Not out of laziness or impatience - I thought it looked just right that way.

I wish I had taken a photo of it once in the booth.  It looks really nice with colorful glassware on the shelves.  It will probably sell pretty quick so I need to be on the lookout for more replacements!


Be sure to check out the latest RE- Party!
We RE-do, RE-decorate, RE-organize, RE-pair,  RE-upholster,  
RE-member, RE-finish, RE-purpose, and of course, we love to RE-lax!   
This party celebrates ALL the RE-'s in our lives!  

I'm linking this post with 

January 15, 2011

Tacky Blue Chair Gets a Makeover

Yahoo!  Another finished project!  Back in June, I bought a very homely ladderback armchair at a yard sale for $5.  I shouldn't have paid even that much, but I felt compelled to rescue this little sweetie. I'm sure some people could have made her even more glorious, but still, I'm pleased with the end result.  This was a thrifty re-do in terms of money spent.  It did, however, require a bit of time - more than should be spent on a piece that ultimately won't have a very high price tag.  Let's just say it was a labor of love.


It's hard to show just how sad she was when I bought her.  The webbing was gross, the foam cushion worse, and the ugly upholstery fabric that was stapled down with all the staples showing was hideous!

 I cleaned her up, got her painted.  She looks so much better in this off white color, but I was just a little too heavy handed with the sanding.  I apologize for that. Then, I began the foufing up phase.  Spell check is clearly not up on decorator technical terms.  It doesn't understand that fouf (or foof? or phouf?) is a word. 

First up - new webbing.  I tried my staple gun. It didn't do well at all.  Then I used tack nails til I ran out. Then, my wonderful hubby, who is the Mac Daddy of Tools, introduced me to his little friend - the air compressor staple gun.  Oooohhhhhh!  I'm in love.  It would have been so much better if I'd only used that for the webbing.  Oh well.  Next time. I forgot to take a photo of the webbing after I finished, but it looked very nice!!!  That was my first experience with webbing.  Even though it was ridiculously easy, I am ridiculously proud of myself.

And then, the crowning glory - the slipcover.  I seldom redo anything in a way that is not washable.  Since our house is raining cats and dogs, slipcovers are the best thing for maintaining at least a moderate level of cleanliness. 

I didn't get all hung up on perfectionism.  I chanted Nester's philosophy that it doesn't have to be perfect to be beautiful. A non-sewer would be highly impressed with my work.  A professional seamstress would turn up her nose. But I must say, it's not to shabby - even the underside looks nice. The fabric was from a really nice curtain panel I had picked up at a yard sale.  I loved the fabric and knew that one day I'd be able to make use of it.  By the way, the fabric doesn't match anything at all in my house, but why get hung up on inconsequential details like that.

I love the tie details at each corner and the ruffle adds such a sweet touch.   Before making these ruffles, I had been entertaining the thought of making a drop cloth ruffle bedskirt for the king sized bed in the master bedroom like the one I featured on this post.  Hmmm.   I don't know if I'm up to facing that challenge just now.

I added a few accessories.  The chair begs for a pillow.  This little chenille pillow is the best I could do with what I have on hand.  It clearly isn't a great choice on this chair so don't judge my decorating skills by it!  I'm picturing a wonderful little needlepoint pillow.  I'm heading out later today for an auction.  Who knows.  Maybe a lovely little pillow (or needlepoint picture I can turn into a pillow) is waiting on me there!  


The books are my effort to keep this chair from becoming a fancy cat bed.  So far, it's working.  I'm not taking any bets about the ribbon staying in place.  Our little darling kitty, Sissy, really knows how to entertain herself with ribbons and bows!


The chair is now the sweetest little thing.  It really belongs in a little girl's room, but I just can't give it up yet.  It is replacing another chair in my room that is in need of a redo.  I'll make do with this little chair til something a little more adult looking comes along.  Meanwhile, I'm going to enjoy it for a while. This is a wonderful job perk of being a booth renter at an antique mall!!!
 
Be sure to check out the latest RE- Party!
We RE-do, RE-decorate, RE-organize, RE-pair,  RE-upholster,
RE-member, RE-finish, RE-purpose, and of course, we love to RE-lax!   
This party celebrates ALL the RE-'s in our lives!  

I'm linking this post with  -

December 13, 2010

Auction Hutch - Sneak Peak

I've been looking for a hutch to paint and put in my booth since August.  Before August, I saw hutches all over.  Once I started looking,  nada... nothing...  Isn't that the way it goes.  Well, my luck finally changed this weekend.  I went to the Van Byars auction in Hogansville and won a hutch.  The price was low, but it's requiring several days of work, paint and new hardware.  

This is the photo from the auction site.  Unfortunately it's not very clear.   

It was a dowdy piece with sad hardware. Was is the key word.  I'm not finished with it, but it already has a new lease on life.

I thought about painting it a taupe-y gray, but decided that might look washed out in our booth.  Black will pop and is a safer color choice for now.  I do intend on experimenting with some grays soon on smaller pieces.

I have a collection of images of black hutches.  One thing I noticed is that I prefer two-toned rather than solid black pieces.  Here's my favorite inspiration photo -
photo from British Cottage
 The light backboard and tabletop keep it from being overwhelmingly dark.  I like the distressing on this piece as well, though I might do a little less than this.

A god many of the inspiration hutches I saw left the back and tabletop wood toned.  I had intended to do this, but my tabletop was too stained to warrant it.  The photo below shows the worst stain after the first round of sanding.  What on earth could have made that stain?!?  More sanding didn't help.


 I had lots of sanding and prep to do, but I had plenty of furry help.


I'm not finished, but here's a peak after the first coat of paint -


I'm loving it and can't wait to finish it up and put it in the booth! Check back soon for the final reveal.
  ~~~~~~~~
Be sure to check out the latest RE- Party!
We RE-do, RE-decorate, RE-organize, RE-pair,  RE-upholster, 
RE-furbish, RE-finish, RE-purpose,  and of course, we love to RE-lax! 
This party celebrates the RE-'s in our lives! 

Take a look at these other wonderful link parties for more clever ideas.  
I'm linking this post with them!

November 24, 2010

Headboard Bench Gets a Makeover

Months ago, I bought a bench at a yardsale.  It was obviously made from a headboard.  The lady who sold it to me said it was an incomplete project that she got tired of looking at.  She just wanted it gone.  I was happy to help her out. 

Thanks to her unfinished project, 
I now have a wonderful bench in my coat room, 
but it was a long time coming.


It sat at our house waiting for attention for ages.  I began to wonder if one day, I too, would just want it gone.  It was already partially painted.  It was as if someone had been putting on the first coat and was interrupted and then never got back to it.  Or maybe they were going to do some sort of two toned finish.  I don't know.

I got started on it last week.  Knowing I would be distressing it, I didn't even prime it.  I wish I had read Barb Blair's great article (Design Sponge) on subtle crackle finish last week.  I would have used a bit of crackle here and there.  I also would have made my first coat of paint something other than black.


I bought some one inch thick foam and put four pieces of it together to form a cushion.  I would have preferred to have one nice four inch thick piece, but Hobby Lobby didn't have it and I didn't have the patience to wait.  As the Nester says, "It doesn't have to be perfect to be beautiful."  I find myself using that quote often these days.  It's a wonderful phrase to help you feel better about not being a perfectionist.  


I made "underwear" for the cushion - a cover for the foam to go under the real slipcover.  I made it from a painter's dropcloth.  I love dropcloth slipcovers for the real slipcover, but in this case, I had something else in mind. I haven't had time to make the real slipcover, so this project isn't officially finished.  I plan to pipe the real slipcover and make it look a little bit snazzy.  


With Thanksgiving cooking to do, I didn't have time to finish.  The bench cushion would have to settle for underwear for a few days.  But then, all my furry friends came to investigate. Ugh oh. I decided to give it a temporary cover out of a fabric similar in color to the one I'll be making. I just wrapped a few yards of fabric around the cushion and tucked it here and there.  Why bother?  Because, I swear, if I didn't , one of the kitties would barf on the dropcloth cover and it was incredibly hard to pull over the foam.  I hope not to have to wash the "bench underwear" very often. So... better safe than sorry.


I had fun playing with pillows. I don't think I have the right look yet. All of these pillows came from yard sales, and I love them, but I believe I need some a little smaller.  I recently found some pillows at a yard sale that would have been great on this bench.  I put them in my booth and they sold.  Dang!  (or , if you speak French, ^%$#@!)  


Once I finish the real slipcover, I'll feature it in another post.  Meanwhile, I'm happy with it.
 
  ~~~~~~~~
Be sure to check out the latest RE- Party!
We RE-do, RE-decorate, RE-organize, RE-pair,  RE-upholster, 
RE-furbish, RE-finish, RE-purpose,  and of course, we love to RE-lax! 
This party celebrates the RE-'s in our lives! 

Take a look at these other wonderful link parties for more clever ideas.  
I'm linking this post with them!

Inspired By...

I'm thinking I need to do a better job of featuring some of the inspiring ideas I come across on blogs.  Here are a few things that caught my eye made me swoon this week in no certain order -

From Design Happens

Notes From A Cottage Industry

Caught in Grace
Maple and Magnolia
It's a Wannabe Decorator's Life
Vignette Design

from Mossy Rock Interiors

from Between Naps on the Porch
Confessions of a Plate Addict
By the way, if you like French music, then open Confessions of a Plate Addict - her playlist is mostly (maybe all) French music, with lots of Carla Bruni (wife of President of France) songs . 

Burlap Runner Tutorial by Confessions of a Plate Addict
Design Sponge - Before and After Basics - by Barb Blair
Leanne from Mossy Rock Interiors actually introduced me to Barb Blair this week.  Leanne's gray table is featured in this post.  She said she learned the whitewash technique from Barb. Barb's real site is Knack, but she writes Before and After Basics articles for Design Sponge.  I have read some of those before, but didn't put all those connections together.  

I will be a regular reader from now on!  I have read a few of the articles and have seen such good hints.  One of her recent articles - Putting the Snap in Your Crackle - shows how to use crackle finishes on just a few areas of a piece in order to create a truly aged look.   I'm totally inspired!!!  Now if I could only have some quality time in my paint room!  
Be sure to check out the latest RE- Party!
We RE-do, RE-decorate, RE-organize, RE-pair,  RE-upholster, RE-furbish, RE-finish, RE-purpose,   
and of course, we love to RE-lax! 
This party celebrates the RE-'s in our lives! 


Technorati - DQMHFW9MB22C

LinkWithin

Related Posts with Thumbnails