Showing posts with label Before and After. Show all posts

June 9, 2013

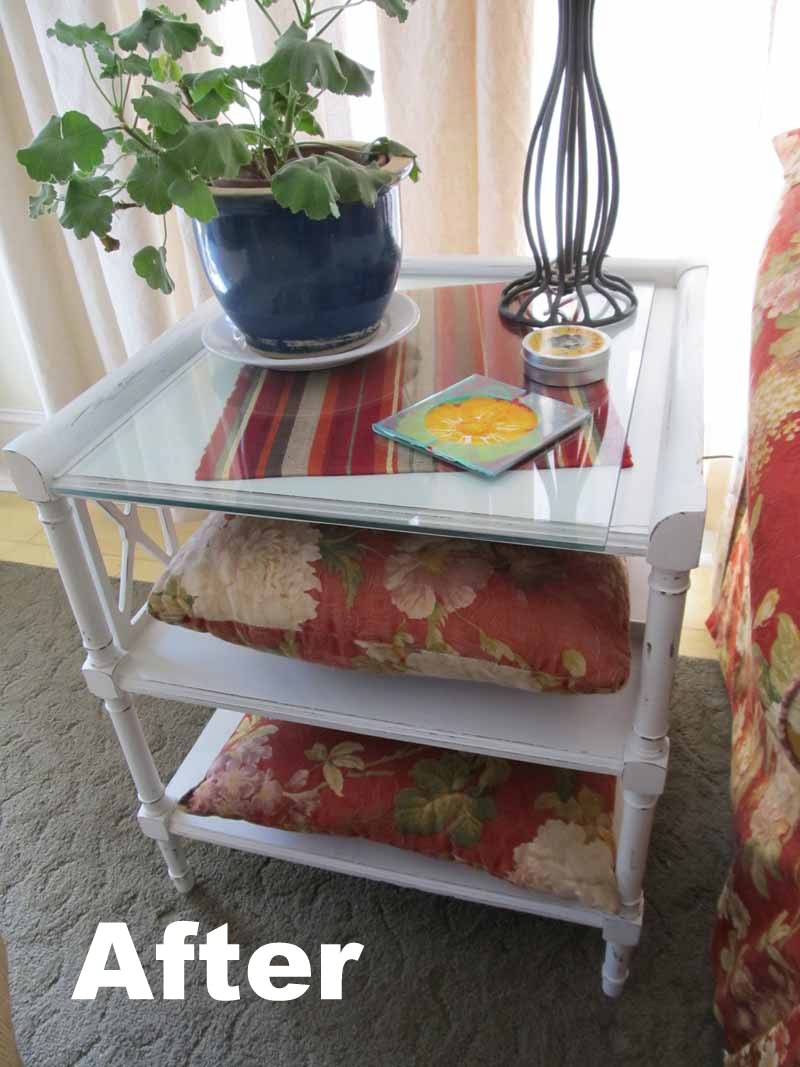
My Grandmother's Side Table Gets a Re-Do

I adored my grandmother.  We were really close.  She's gone now, but to tell the truth, it feels like shes still with me.  I generally know what she'd say about things, but I have no idea what she'd say about seeing her side table painted.  She took a paintbrush to many of her things over the years, so hopefully she'd like it.

The table was one that she had in her den as long as I can remember.  I used to love to dust at her house and this table was a fun spot for that.  Thinking back, I don't actually remember anything being dusty.  I just loved moved her treasures around and hearing her talk about them.  Unfortunately, that love of dusting didn't last into my adult years.


Anyway, back to the table.  It had seen better days.  I am in a phase where I'm looking at everything I own and thinking, "Use it or lose it".  This table was not being used.  I was NOT letting it go.  In order to keep it, I needed to make it pretty and put it in a spot where it would make sense.  I'm proud to say, I did just that.


I love color and thought about all sorts of colors I could use.  In the end, I went with white.  It just seemed right for this table.  When my grandmother had this table, the bottom shelves were always filled with books and magazines.  At our house, they are holding the sofa pillows.  Hubby always tosses them off to give our dogs more room on the couch.  That's the sad situation at our house.  Dogs trump wife.  I put the pillows back on.  Now, they are stored on this table and I can access them when I want.

I put a piece of glass on top of the table.  This was a piece that I had in the attic.  It almost fit.  Hubby got a new piece for me that fits perfectly.  I don't have a photo of that and I'm just too lazy to take another.

This project was completed a couple of months ago.  I have been really bad about posting lately.  I'm playing catchup.  Looking at this photo reminds me of things that have changed and are changing.  My current project is making a slipcover for the loveseat.  The worst of that is finished.  I just need to finish the cushion covers.  I need a day where energy and motivation combine.  :-D

February 28, 2013

The Chippy Red Chest

I was able to breathe new life into a red chest with just a little sandpaper and some new knobs.  Quick and easy!  The result is a very quirky little chest that we are using as a coffee table.


Before it was more of a solid red.  I didn't take good before photos.  I got going before even thinking about photos.  I remembered after I had already started sanding.  I hadn't done much on the drawers yet, so you can sort of get an idea of the red before look.


The black knobs wouldn't do.  I found these red ones at Hobby Lobby.  They weren't my first choice.  They didn't have 6 of the ones I liked best.  Sigh.


The photo above shows some of the old knobs and some of the new.  I did replace all the knobs.  What didn't I do?  Take a good photo of the chest all set up in the room.

June 15, 2012

Retro Table Quick Paint Makeover

I've had a nice retro enamel top table in my booth for a while now.  It hasn't sold, but should have.  Every time I've looked at it, I thought how cute it would be painted.  I hesitated because it was a bit unique in it's original condition.  Last week, I gave in to temptation and went after it with a paintbrush. I'm so glad I did.


The photo looks like the turquoise base is rather flat and dull.  It's not.  It has a very subtle glazed wax finish.  I love it.

My booth has lost several large pieces recently.  My large farm table is being featured up front.  Plus I a few large things.  That made room for this little beauty to be put right in front.  The pop of color adds a little something extra to the booth.


And just to compare, here's a photo of the table before.  I really thought someone would want it like this.  You just don't see unpainted wood bases that often on these old table.  Oh well.


May 16, 2012

The Gray Ballfoot Table Before and After

I came a cross a nice vintage table a few weeks ago.  It was begging for a makeover.  The lady who sold it to me had held onto it for ages, intending to redo it herself.  She finally decided she didn't know if she'd ever get around to it.

It had great details including over-the-top claw feet.   Actually, it's not exactly a style I'm usually drawn to, but there was something about this table that I really liked.

By the way, I did a lousy job taking before photos.  The above picture is the best I've got.  And I had already begun painting one leg when this was taken.

First it needed some TLC in the structure.  It was a bit wobbly.  My husband is the king of making things sturdy.

Next it needed paint.  There were some deep stains in the top so there was never any thought of finishing it naturally.  I'm glad.  I knew this table would look great painted.

I used a medium gray that I had on hand and mixed in a bit of calcium carbonate to make chalk paint.   Love it.


Next, I did a little sandpaper distressing, then finished it with Fiddes Wax - first a coat of Light (which is clear), then a light coat of Rugger Brown.  The next day, I buffed it a little, which leaves it with a nice smooth finish - not tacky or waxy feeling at all.

Voila!  I love the finished look and went all over my house trying to see if  there was anyplace I could use it.  I have some tables I'm hoping to replace but this table unfortunately is too big for those spots.  Darn it!  It's going over to The White Booth.  I hope the new owner loves it as much as I do!


March 25, 2012

Kitchen Cupboard Before and After

Holy Cow!  What a difference!  My wonderful hubby and I did a makeover on a cupboard he'd made years ago.  At the time he made it, function was the priority.  But now, it's functional and fabulous!!!


My previous house had very little functional kitchen space.  I had to get creative and store kitchen goods in other places around the house.  He made this cabinet with closed doors to go in another room without appearing too kitchen-y.

The doors were mostly plywood.  The back was plywood.  Yuk. 

When we moved, it was put in the kitchen, but I was keeping my eye out for a better piece.  I hardly ever took photos that included this cabinet.  I had a heck of a time finding one to show you.  The photo above was taken about a month after we moved. 

This photo shows a closer view of the awful plywood doors I thought about painting this cabinet many times, but, truthfully, I didn't think I could improve on it that much.  I just wanted it replaced.

Thankfully, I never found anything that would function as well as this one, so instead of replacing it, we decided to make it pretty. 

The main part of the makeover was getting rid of all the plywood.  Rudy made new doors (obviously the biggest improvement) and attached heavy screen for a vintage look. It was his idea to use the hot and cold knobs for handles.


By the way, I have to say that my dear hubby has been coming up with some brilliant ideas and suggestions lately.  I really wish he'd get into this makeover stuff for my booth because honestly, he'd be amazing!  He's always been incredibly gifted at building, but now he's become a bit of a genius with the creative design bit as well.

I was adamant that the plywood back should be replaced by planks.  We are both very happy with the results on that, too.

Most of the cabinet was painted white (mixed with calcium carbonate to make chalk paint) and sealed with clear wax, but the planks on the back were painted gray - also made into chalk paint, distressed, and sealed with brown wax.  I love how the grain came through.  The gray background really sets everything off and feels more interesting to me than a solid white cupboard.

Note:  Wax is great for finishing most chalk paint projects, but when I paint something that will get more wear and tear, like on a kitchen table, I prefer a poly topcoat.  It still looks great.


Rudy added a top which overhangs the main cabinet.  It's totally for looks, but it was totally worth the effort.  I painted it white, distressed it, then stained and sealed it with brown wax. It appears more brown that white. I wish I'd taken a picture of it because it's a really nice color, too.  Too bad no one but me will see it - when I climb up on a step stool to dust.  (Which means I'm not likely to see it all that often).

One other big improvement -  Rudy added a few more shelves on the inside.  I had used lots of plastic-covered-wire-stacker-things before in order to make the most of the space.  Having plenty of wood shelves is soooooo much better.  (Joan Crawford voice-over) NO MORE WIRE SHELVES!

I had a great time putting things back in the cabinet.  At first I filled the cupboard with mostly my collection of Cornflower Corning.  Many of these dishes were my grandmothers, so even though I had a colorful look in mind, I wanted to give it a try.  As expected, it wasn't the look I wanted.


Next, I weeded out the corning, keeping out just the pieces I used most frequently.  Then I pulled out things I had tucked here and there that were both functional and nice to look at.  Those were placed first.  Then I put in a few things that were very functional and OK to look at.  Last, I put in some things that I'll hardly ever use, but they bring me lots of joy to look at.  My tablecloths fall into that category.  Most all of these came from people who are special to me.  In fact, just about everything in this cupboard has stories behind them. 


I think this piece is now my favorite piece of furniture in the house.  It has so many memories attached to it.  It was made with love, made over with love, and filled with things I love.

January 6, 2012

A Fairy Tray

I transformed a silver tray and a vintage picture by combining them.


I had a lovely antique picture of fairies.  The original frame was broken.  I put the print in an old, heavy, beautifully tarnished, silver tray using decoupage medium.


It was a match meant to be - I didn't even have to trim!  It's sooooooo pretty.  I wanted to keep it, but forced myself to take it to the booth, where I hope it will find a home with someone who'll love it as much as I do.  Or maybe I hope that it sits there unsold and I have to bring it back home.  If it's still there the next time I go over, I may have to bring it back home.  I'm having seller's remorse!

Isn't this picture enchanting?

A Mantel and a Ladder

I am trying to get better about posting my projects.  Here are two that I took over to The White Booth just yesterday.

The biggest project was a very simple vintage mantel.  By simple, I am referring to the lines.  There are no frills or extra ornamentation on this one.  I like that.  It makes a wonderful stage for putting together a fresh, simple mantel vignette.


I also took over a ladder that I finished in a cottage-y style.  I wish I had the before on this one.  I love how fresh and clean it looks.  Mind you, it was a dirty ladder, but it had no character before.  By the way, if you want to see why I get excited over ladders, take a look at this post.


November 18, 2011

Decoupaging a Divider Screen

Every now and then, I do a project that turns out so good, I can hardly believe I did it.  One of my most recent projects was to decoupage a divider screen.  The divider turned out great and is now being used in my booth.

I bought the screen at a yard sale.  It was in various stages of a redo involving paint and wallpaper.

I decoupaged one side with old yellowed dictionary pages.  I used matte Mod Podge on this side. This side is facing my neighbor's booth.


The other side - the most fun side - was decoupaged magazine ads.  I used old magazines from the 40's and 50's.  


I found so many quirky ads.  Even tough I personally chose and cut out and attached each ad, I still find myself browsing the screen to revisit them.


There were tons of ads for retro colored appliances - loved those!


Unfortunately, right now not much of the screen is showing in my booth.  I have my booth pretty full. Oh well.  It'll show better later.  Meanwhile, it still makes me happy.

November 17, 2011

Mantel Redo

The mantel I refinished this month just sold.  It didn't last long in The White Booth. 


I came very close to keeping this one.  It doesn't matter that we don't actually have a fireplace.  After all, I've seen loads of inspiration for Faux Fireplaces. 

In the end, we decided against using it.  Once that decision was made, a redo was called for.  It looked lovely with the oak finish and I had some serious qualms about putting paint on a piece that looked this good natural. But the truth is, unpainted mantels don't sell as well as painted ones.  And if I wanted to put it in The White Booth (TWB), then it needed to be a very light color.  We use creams and greys in TWB, too, but, even though I'm on a gray kick right now, I decided to paint it white.

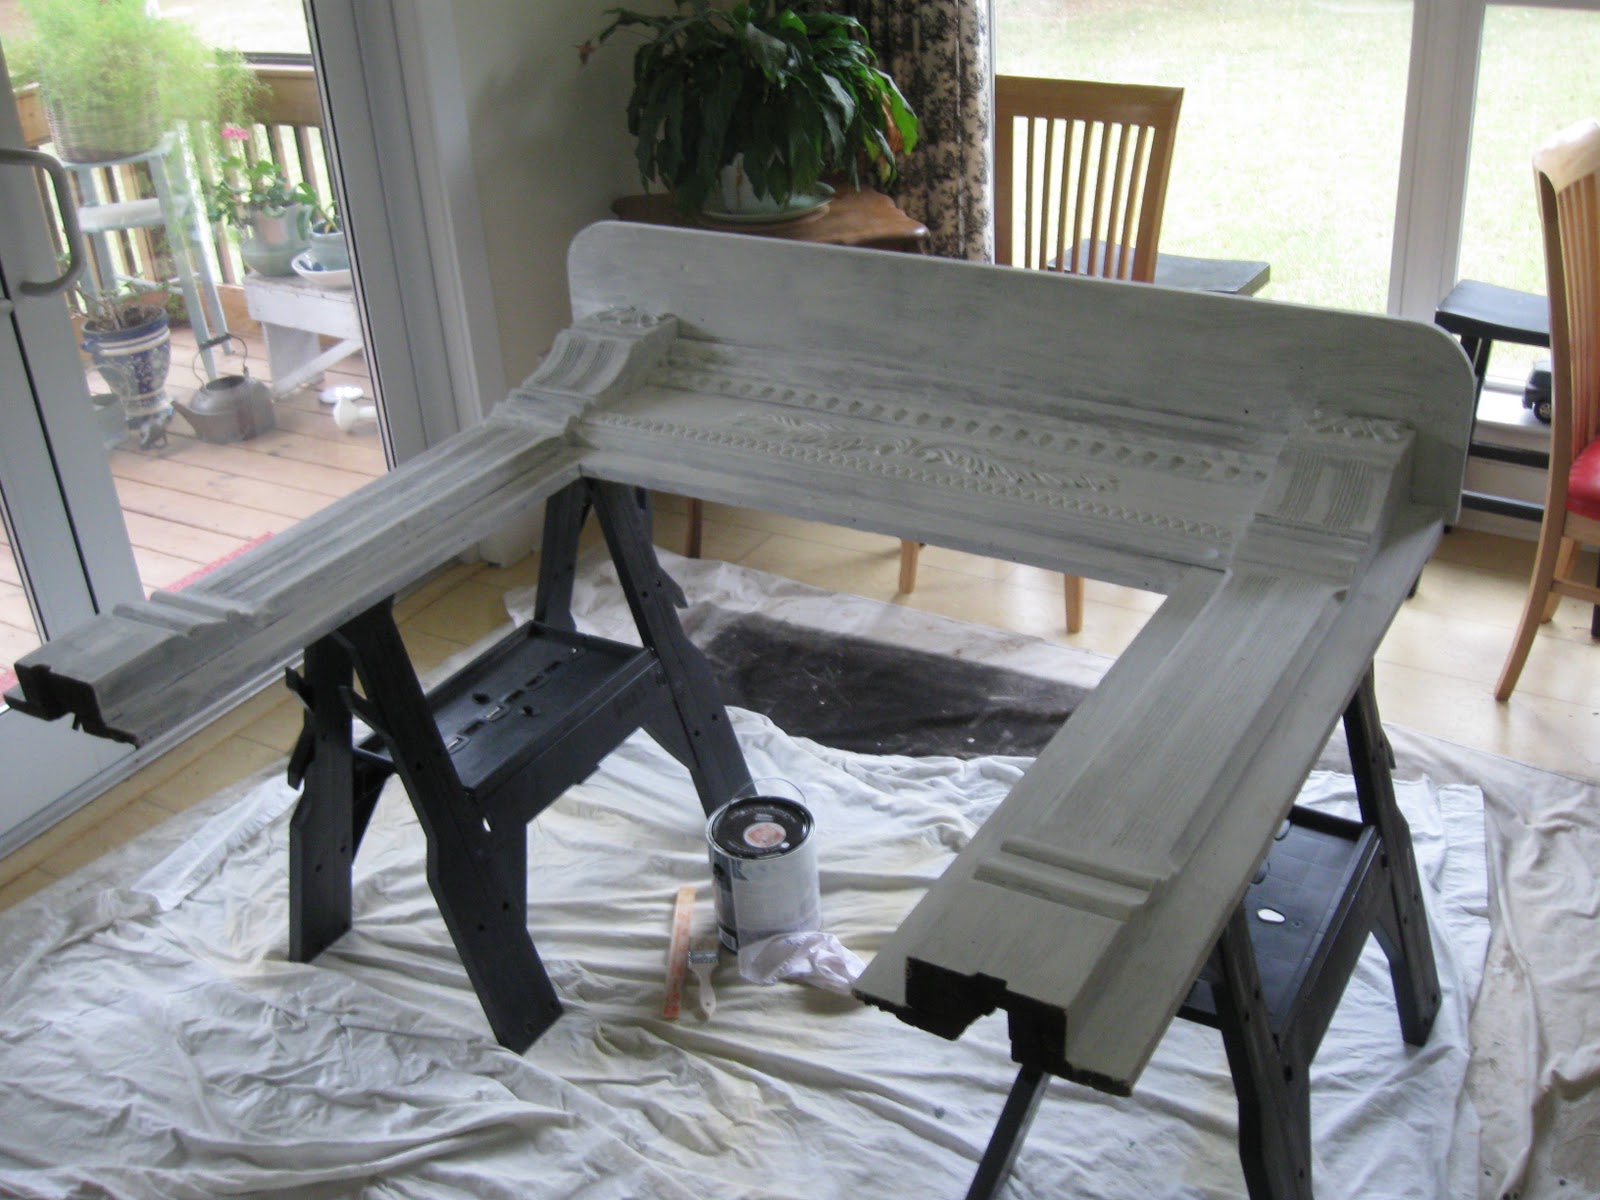
Here are some photos of the transformation.  This isn't a redo where the before look is ghastly.  As you can see in the before photos, it looked wonderful before.  The only thing I didn't like at all was the faux brick.  That came off very easily.  Some people will likely think the before look is the best.  It all depends on your style. 


The people I bought the mantel from had gone to a great deal of trouble to removed years of paint and bring it back to its glory.  Even now, knowing it came out pretty, I feel pangs of guilt.  Too late now.  And a sale was made to a customer I adore - Bonnie H.  So that's enough remorse.


After one coat of primer, it looked pretty sad.  This is always the low point in a redo where you wonder what the heck you've done.

Another coat of paint makes it look much better, but it was pretty bland. 


All those details were just begging to be highlighted.  What to do?  Glaze?  No.  I wanted it to be white.  Distress.  Yes. 


I liked this look.  No need to do anything more.

After it cured for a bit, it was time for the debut in TWB. It was put in place right around our booth transformation date.  The fall naturals had been pulled and the booth was very plain and clean looking.  It looks really nice like that, too.


A few days later, TWB was transformed with glitz and bling.  The booth looked great and the mantel was fabulous!  Everything on the mantel sold within 2 days.  It had to be re-glitzed. 


Farewell, pretty mantel.  I know you'll be happy in your new home.

June 26, 2011

Table and Chairs - Before and After

I completed a table and chair set and it *finally* turned out well.


I put the set in The B Hive Booth at Rockin' B.  The chairs sold in a couple of days.  Wow.

The chairs were my first set after I got married.  Back then, pine furniture was the rage. I used them like that for several years. I stained them dark when the next style came along.  At some point their rush seats became tattered and I put the chairs in storage.  I have no idea why I didn't get rid of them all this time.


Now that I have a booth, I knew it was time for me to give these chairs a new lease on life.  First, I wove new seats.  I wove them out of drop cloth fabric and they looked pretty cool.  I hate painting chairs and was hoping I could get away with leaving these dark. I put them over at Rockin' B and waited.  Every time I looked at them, I felt a pang of regret.  I should have painted them.  And they didn't sell.  Once we started the B Hive Booth, with everything white and cream, I new the time had come.  I needed to take those chairs back home and paint them!

Painting took a bit more time because now I had to tape off the woven seats. In the end it was worth it.
I love, love, love them, and even thought about keeping them.  After a firm talk with myself about not keeping everything I like, I took them over to the booth.

The table was just a butcher block top with painted legs that was so popular 10 or so years ago.  It's sturdy and well made.  I love the size of it - just right for a small kitchen table.  It would even work great as a desk and I considered keeping it for that.  But I was firm with myself again and didn't.  I needed a table to go with my chairs.

The table turned out nice, but the distressing wasn't as striking as the chairs because the under color was not dark.  It was still pretty, don't get me wrong, but it didn't go perfectly with the chairs. Still I prefer the look of the chairs and think I may play around with painting dark undercoats the next time I paint a light piece of furniture.  

In the end, it didn't matter that the table didn't quite match the chairs.  The woman who bought the chairs already had a table.  Now I'm thinking of setting the table up to look like a desk.  All it needs is a great chair to put with it.

By the way, most everything on and around this table sold within a matter of days.  The chairs, the tablecloth, the bowl, the chandelier...  sold, sold, sold, and sold.  This booth is loads of fun, but it sure is hard keeping it full.  That's a wonderful problem to have.

June 3, 2011

White Hutch Makeover

I finally finished the white hutch and got it into our white booth, which I'm trying to remember to call by it's new name - The B Hive.  The hutch turned out really nice. 

It previously had a maple finish. I'm sure it was nice in its day, but it sure looked dated and unloved when I got it.

The white is not a stark white.  It's sort of ivory.  Once I sanded in key spots, the hutch looked more cream colored.  That distressing sure does make a difference.  At that point it looked so good that I decided not to stain over it with wax or gel. 

The hutch was moved into the booth a week or two ago, at least most of it was.  We were doing the initial booth arrangement and a hutch is no easy thing to move around.  And this hutch is really heavy!  I'm sure I developed a hernia or slipped disk or pulled muscle or something from the strain of lifting!

The doors were not ready - they took twice as long - two sides - and I wasn't rushing them.  It was no big deal having the doors off.  We merchandised the open spaces.

Finally, yesterday I got it all in place.  The hutch actually has four doors, but everyone felt that the hutch looked great with the top two doors off, so those are tucked in a drawer for whoever buys it to use or not.

I'm pretty pleased with this makeover.  My only disappointment is that I cannot find my before photos!  Shoot!  I know I took them.  but that was before the old computer crashed and everything was moved to the new laptop.  Oh well.  You'll just have to take my word for it - it looks sooooo much better.


 The are removable shelves in the side sections.  I have one in place and the other is on the bottom of the section.


 The photos don't do justice to the side columns.  Those are really nice.  Also, I love how the old hardware looks - especially the pulls.
Here it is in the booth.  I'm glad I have these photos because I don't think it will be there long.  I had lots of people inquiring about it even before the were doors on. 

May 15, 2011

Mr. Wheat's Rockers

Mr. Wheat replaced his front porch rockers.  He gave the four old ones to me.  The bones were good and sturdy but had definitely seen better days.  Time for a bit of rocker resuscitation!

The first step was to remove all the seat rushing.  This was no small task.  It was messy and dusty.  Mr. Wheat keeps a spotless home, but anytime furniture is left outside, even on a covered porch, the are places that even a clean freak can't clean.  Between the rushes is one of those places.

Next I painted the rockers white.  Painting chairs and rockers is very tedious, so I decided this was a fine time to finally try out my new power spray paint gizmo.

That may have been my first and last time using a power sprayer.  I have a love/hate relationship with the thing.

LOVE:
  • It covers in no time.  

HATE:
  • It uses up paint at a shocking rate.  
  • Each time the container gets a little low (which is very, very often), the paint spits out, making blobs that need to be touched up immediately.  
  • At one point I didn't screw the container on correctly and when I picked up the sprayer, the container dropped and paint went everywhere.  
  • I used three large dropcloths.  (The photo above doesn't show them all.  I had already started moving stuff when I remembered to take a photo.)  Three dropcloths was not enough.  
  • The sprayer should not be used when there's any wind at all.  
  • The sprayer needs to be cleaned up very, very well, otherwise it won't work well the next time you use it.  It takes a long time and a lot of water to clean all the parts. 
  • By the end I was exhausted and covered in paint from head to toe.  I am not a power sprayer kind of girl.  I'll stick to my nice and slow and slightly meditative old fashioned painting.  But the chairs turned out great.

Note - If you had two very organized people working together and you had a lot of things you wanted to paint the same color and  if you were willing to use up a lot of paint and if you had a great place to paint with lots of drop-cloths, the power sprayer could be a very good thing.

Once the paint had thoroughly cured, it was time to weave the seats and back. 
I have a chair-weaving tutorial in a previous post.

Even though I stuck to a color palette of red, green, tan, and white, the pattern is still a little busy.  I'm not worried.  Once I add pillows and cushions, not so much of the pattern will show up.  Meanwhile, the pattern hides dirt and fur.

Once I sat in the chairs, I realized that they weren't all that comfortable.  They could use some cushions.  Not a problem.  I came across four old cushions at a yard sale that fit perfectly.

The cushions are weathered and worn, but that didn't concern me.  I'm planning to make covers for them in a pretty fabric.  That means I can't mark this project off my list.  I also want to add small pillows on the chairs.  That's not a huge rush.  I'm keeping my eye out at yard sales.  Maybe I'll even come across some that don't need to be re-covered! 

I have shared this post on the following link parties:
Saturday Nite Special at Funky Junk Interiors
Favorite Things Saturday at Bargain Hunting with Laurie 
Weekend Wrap Up Party at Tatertots and Jello  

February 5, 2011

Experimenting with Green Chairs

In my quest for dining room chairs I love, I am experimenting with green finishes.  I found a green paint that I find very appealing.  I had several chairs in my attic waiting a new finish.  I am using those to experiment with. 

Back in the summer my sister-in-law and I came across two vintage chairs just waiting for a makeover at the bargain price of 2 dollars each!  They are sturdy and well made. 


First I painted them with several coats of Behr Premium Plus Ultra Paint and Primer in One, custom mixed to match Martha Stewarts MSL106 - Rhododendron Leaf. I have really been liking this paint.  It has ceramic in it.  I've only needed two coats for everything I've done so far.  Plus, it seems really tough.


At this point, the green is pretty, but it's a little boring.

I did some distress sanding, then mixed up a glaze.  I didn't waste a lot of time fretting over my glaze.  First I mixed a brown I liked by using a bit of medium brown craft paint I had on hand and adding black to make it a darker brown.

Then I added the glaze mix.  I had a ratio of about 2 parts glaze to one part paint.  Even so, I had less time to play with it than I would have liked.  I would also rather have a glaze mix in a container that was easier to pour. 

Glazing is OK, but I think I like using Howards Citrus Wax in mahogany better for adding a little age and character.  (I'll show that technique in a post coming soon about an end table I just finished.)  I also might try the dry brushing technique used by Miss Mustard.  I talked about that and linked to it in my last post.


The photo below shows the two chairs in two stages.  On the left the chair has been sanded, but not glazed.  On the right, it's finished.  My glazing was fairly subtle.  I wiped a whole lot off.  It's not all that easy to see a difference, but it definitely looks more aged after the glazing.  These chairs didn't have a lot of nooks and crannies for glaze to accentuate.  The dry brushing technique probably would have been more appropriate.  Unfortunately, I came across that idea after I had already glazed.

On a funny note, after my husband saw the distressed and glazed chairs, he said they looked like chairs that needed to be painted.  He was trying to push my buttons.  I swear, that man lives to aggravate me!  And clearly, he doesn't recognize that he is in the presence of an amazing artist!


Here's a closeup. Again the one on the right is glazed.  The one on the left is not.  The closeup shows how the glaze got into the imperfections just enough to add age and character. 

I moved the chairs to the dining room to live with the color for a bit.  (Sorry, no photos)  I like the color and I like what the color adds to the room.  These two chairs are not the style I'm looking for.  

What kind of chairs am I looking for?  I want chairs with tall backs and solid seats.  They need to be heavy and sturdy.  And they must be comfortable.  I know I'll find MY CHAIRS one of these days.  I have a feeling it won't be long.

LinkWithin

Related Posts with Thumbnails